
LORA
٨/٨/٢٠٢٦
درس: تدريب LoRA باستخدام Runpod AI Toolkit و FLUX.2
1. مقدمة عن Runpod AI Toolkit
إذا كنت ترغب في استخدام AI Toolkit ولا تملك وحدة معالجة رسومات (GPU) في المنزل، أو ربما لا تملك وحدة بذاكرة (VRAM) كافية، يمكنك استخدام مزود سحابي للحصول على قوة حوسبة إضافية لتدريب نماذجك. أحد المزودين السحابيين الموصى بهم هو RunPod. يعد استخدام AI Toolkit على RunPod أو غيره من المزودين السحابيين من أسرع الطرق للبدء لأنه يسحب كل شيء من صورة Docker. لن تضطر للقلق بشأن التبعيات البرمجية وتثبيت كل شيء؛ ما عليك سوى تشغيله والبدء فورًا.
خطوات النشر السحابي
- اختيار الأجهزة: في لوحة تحكم RunPod، انتقل إلى قسم "pods" لعرض وحدات معالجة الرسومات المتاحة. أفضل الخيارات مقابل السعر حاليًا هي 4090 أو 5090 أو RTX Pro 6000s. تمتلك وحدة RTX Pro 6000 ذاكرة عشوائية (VRAM) بسعة 96 جيجابايت، وهي سريعة وستقوم بتدريب أي شيء تقريبًا. بالنسبة لبنية نموذج Flux 2 الضخمة، يتطلب التدريب وحدة معالجة رسومات بذاكرة 64 جيجابايت على الأقل (مثل NVIDIA RTX 6000 Ada أو H100 أو H200). لن يتناسب النموذج مع البطاقات الاستهلاكية بسعة 48 جيجابايت أو 24 جيجابايت بصيغة FP8 دون عملية تفريغ (Offloading) شديدة.
- إعداد القالب: انقر على "تغيير القالب" (change template)، واكتب "ostris ost" في شريط البحث، ثم حدد "AI toolkit-ost-i-official"، وهي النسخة المحدثة والمدعومة رسميًا.
- تأمين نقطة النهاية: انقر على "تعديل القالب" (edit template) وانتقل إلى متغيرات البيئة. قم بتغيير كلمة المرور الافتراضية
AI_TOOLKIT_PASSWORDإلى كلمة مرور خاصة بك أو سر من أسرار RunPod. يؤمن هذا الإجراء خادمك بحيث إذا كان هناك من يتجسس على المنافذ عبر الإنترنت، فلن يكون لديه حرية التصرف في بياناتك ونماذجك.
- تخصيص التخزين والنشر: خصص ما لا يقل عن 300 جيجابايت من مساحة تخزين الحاوية لاستيعاب أوزان النموذج الضخمة، والموترات المكممة (Quantized Tensors)، ونقاط الفحص الخاصة بالتدريب. انقر على "تطبيق التجاوزات" (set overrides)، ثم "نشر عند الطلب" (deploy on demand)، وانتظر الضوء الأخضر.
- تشغيل الواجهة: انقر على الـ pod وحدد "HTTP service" للوصول إلى واجهة مستخدم AI toolkit، ثم أدخل كلمة المرور التي قمت بإعدادها.
- إدارة التكاليف: بمجرد الانتهاء من التدريب، تأكد من إيقاف (stop) وإنهاء (terminate) الـ pod الخاص بك حتى لا تهدر أموالك بينما يظل قيد التشغيل دون استخدام.
2. المواصفات التقنية لنوذج FLUX.2 والتحديثات
يُعد Flux 2 نموذجًا قويًا للغاية يحتوي على 32 مليار معلمة. عند دمجه مع مشفر النص Mistral Small 3.1، وهو نموذج لغة بصري (VLM) يحتوي على 24 مليار معلمة، يستخدم مسار العمل بالكامل حوالي 56 مليار معلمة. قبل بدء التدريب، من الضروري فهم التحديثات البنيوية التالية:
- تقطير التوجيه (Guidance Distillation): يعمل بشكل مطابق لنموذج Flux 1 Dev. يعتمد على تضمين توجيه بتمريرة واحدة (يُضبط عادةً على حوالي 3.0 للاستنتاج). أما بالنسبة للتدريب، يجب ضبط التوجيه بدقة على 1.0 (والذي يعمل كقيمة غير تشغيلية $CFG = 0$).
- المشفر التلقائي (VAE) بـ 32 قناة: تمت ترقيته من 16 قناة، مما يقلل من تدهور البكسلات عبر دورات التشفير وفك التشفير المتعددة، مما يجعله شديد الاستجابة للقوام الدقيق وضربات الفرشاة.
- طبقات الانتباه المدمجة: يدمج التنفيذ الرسمي آليات الانتباه (Q و K و V) في طبقة خطية متكاملة واحدة. بناءً على ذلك، توفر رتبة الشبكة (Network Rank) بقيمة 32 سعة أكبر بكثير من الرتبة المماثلة في المعماريات المنفصلة.
- متطلبات الأجهزة: نظرًا لحجمه الضخم، يتطلب تحميل مشفر النص وحده بدقة 8-bit ذاكرة VRAM بسعة 24 جيجابايت.
3. مصادقة Hugging Face
المصادقة مطلوبة للوصول إلى المستودعات المقيدة الأوزان.
- انتقل إلى إعدادات حساب Hugging Face الخاص بك واقبل شروط استخدام نموذج Flux 2.
- قم بإنشاء رمز وصول (Access Token) جديد بصلاحيات القراءة (Read).
- داخل واجهة مستخدم AI Toolkit، افتح علامة التبويب Settings (الإعدادات)، والصق رمز الوصول الخاص بك، ثم احفظ التغييرات.
4. إعداد مجموعة البيانات والوصف الديناميكي
هذه العملية حاسمة لعزل الأسلوب الفني عن الدلالات الهيكلية للصور.
- اجمع مجموعة بيانات نظيفة للصور المستهدفة (على سبيل المثال، 15–20 لوحة فنية عالية الدقة للملكية العامة).
- قم برفعها ضمن قسم "Data Set" ثم "New Data Set".
- اكتب وصفًا للصور يحدد العناصر الهيكلية مع تعمد حذف التفاصيل الجمالية. على سبيل المثال، استخدم:
[trigger] قارب على الماء بداخله رجلان.
- من خلال وضع
[trigger]بين أقواس، ستقوم أداة AI Toolkit بضخ عبارة التشغيل المستهدفة ديناميكيًا أثناء التشغيل.
- تجنب العبارات الوصفية مثل "ضربات فرشاة خفيفة" أو "نسيج رسم زيتي"—ترك هذه التفاصيل دون وصف يجبر النموذج على ربط تلك السمات البصرية مباشرة بكلمة التشغيل التي اخترتها.
5. إعدادات LoRA والحفاظ على المخرجات التفاضلية (DOP)
إعداد معلمات LoRA
- قم بإنشاء مهمة جديدة (New Job) وحدد
flux 2كبنية النموذج الأساسية.
- اضبط تنسيق دقة البيانات على Float 8 (FP8) لكل من شبكة المحول ومشفر النص، حيث أن التكميم (Quantization) أمر حتمي حتى على الأجهزة المخصصة للشركات.
- قم بتعيين رتبة الشبكة (Network Rank) على 32 واضبط مقياس التوجيه للتدريب على 1.0.
إعداد الحفاظ على المخرجات التفاضلية (DOP)
تمنع هذه التقنية النسيان الكارثي (Catastrophic forgetting) وتسرب الأسلوب إلى أساس النموذج.
- قم بتفعيل إعداد Differential Output Preservation في لوحة التحكم.
- أدخل كلمة التشغيل المخصصة الخاصة بك (مثل
morisot style).
- حدد فئة الحفظ (Preservation Class) الخاصة بك لتكون
photo(صورة فوتوغرافية).
- الآلية: أثناء خطوة التدريب، تقوم الأداة ديناميكيًا بتكرار الدفعة (Batch). بالنسبة لتمريرة التنظيم، فإنها تزيل طبقة LoRA، وتستبدل نص التشغيل بكلمة
photo، وتجبر النموذج على مطابقة مخرجاته الكامنة الأصلية. يمنع هذا نموذج LoRA الخاص بك من إتلاف المعرفة المفاهيمية الأساسية (مثل جعل كل وجه عادي يبدو كلوحة فنية).
- ملاحظة: نظرًا لأنه يتم إعادة كتابة رموز الإدخال (Input tokens) ديناميكيًا في كل خطوة، لا يمكنك تخزين التضمينات النصية مؤقتًا (Cache text embeddings) عندما يكون هذا الخيار نشطًا.
6. مطالبات التحقق ومقاييس التقييم
- حدد مطالبات التحقق (Validation prompts) القياسية لتحويل النص إلى صورة لتتبع اكتساب الأسلوب (على سبيل المثال:
[trigger] امرأة تلعب الشطرنج في حديقة مع قنبلة تنفجر في الخلفية).
- حدد مطالبات التحرير القائمة على التعليمات لاختبار المرونة متعددة الوسائط للنموذج (على سبيل المثال:
اجعل هذه الصورة بأسلوب [trigger]).
- ابدأ المهمة. سيتم تشغيل التدريب بمعدل يتراوح بين 6.3 إلى 8.0 ثانية لكل تكرار تقريبًا اعتمادًا على دقة الصور. نفذ التشغيل لإجمالي 3000 خطوة.
التقييم ما بعد التدريب
عند الانتهاء من التشغيل لـ 3000 خطوة، راجع نقاط الفحص (Checkpoints) مقابل السلوكيات المتوقعة التالية:
مرحلة الفحص (الخطوات) | سلوك النص إلى صورة | سلوك تحرير الصور |
الخطوات الأولى (< 500) | مظهر النموذج الأصلي؛ التخطيط النصي صحيح ولكنه يفتقر إلى القوام الفني المميز. | تحويل قياسي للصور؛ تحولات طفيفة في الإضاءة دون تشوه هيكلي. |
منتصف الطريق (1,500) | ظهور قوام التلوين الدقيق، والعناصر الرقيقة، ودقة عالية لضربات الفرشاة الثقيلة. | يبدأ في تخطيط سمات التدريب الأصلية؛ احتفاظ قوي بهوية الموضوعات الأساسية. |
المرحلة النهائية (3,000) | تطبيق أسلوب معزول بالكامل؛ التزام دلالي عالٍ بالمطالبات النصية على الرغم من التصيير التجريدي. | نقل أسلوبي سلس باستخدام المشفر التلقائي (VAE) ذي 32 قناة للحصول على دقة قوام عميقة. |
تصحيح التحيز: إذا لاحظت تحيزًا ديموغرافيًا (على سبيل المثال، ميل الصور الشخصية للتحول نحو جنس معين أو عرق موجود في مجموعة البيانات الخاصة بك)، اضبط وزن المطالبة أو قم بضخ أوصاف صريحة للغاية في مطالبات التحقق الخاصة بك (مثل رجل بشارب كثيف) للحفاظ على التحكم في التوليدات الأساسية.
Ai Guide | دليل الذكاء الاصطناعي - by Sameh Al Tawil
📘 Ai Guide: RunPod AI Toolkit & FLUX.2 LoRA Training
1. Introduction to Runpod AI Toolkit
If you want to use AI toolkit and you don't have a GPU at home, or maybe you just don't have a GPU with enough VRAM, you can use a cloud provider to gain extra compute to train extra models. One highly recommended cloud provider is RunPod. Using AI toolkit on RunPod or other cloud providers is one of the fastest ways to get started because it pulls everything down from a Docker image. You don't have to worry about dependencies and installing everything; you just spin it up and go.
Support Note: You can use the affiliate link in the original video description to sign up for RunPod, which helps support the AI toolkit channel and ongoing development work.
Step-by-Step Cloud Deployment
- Select Hardware: On the RunPod dashboard, go to the "pods" section to view available GPUs. The best values for the money are currently the 4090, 5090, or RTX Pro 6000s. The RTX Pro 6000 has 96 gigabytes of VRAM, is fast, and will train pretty much anything. For the massive Flux 2 architecture, training requires at least a 64 GB+ VRAM GPU (e.g., NVIDIA RTX 6000 Ada, H100, or H200). It will not fit on consumer-grade 48 GB or 24 GB cards at FP8 without severe offloading.
- Configure Template: Click "change template", type "ostris ost" in the search bar, and select "AI toolkit-ost-i-official", which is the officially maintained and most up-to-date version.
- Secure the Endpoint: Click "edit template" and navigate to the environment variables. Change the default
AI_TOOLKIT_PASSWORDto your own password or a RunPod secret. This secures the endpoint so if anyone is sniffing ports on the internet, they don't have free reign to do whatever they want with your trainings.
- Allocate Storage & Deploy: Allocate at least 300 GB of container disk storage to accommodate massive model weights, quantized tensors, and training checkpoints. Click "set overrides", then "deploy on demand", and wait for the green light.
- Launch UI: Click on the pod and select "HTTP service" to reach the AI toolkit web UI, then enter your configured password.
- Cost Management: Once you get done training, be sure to stop and terminate your pod so you are not wasting any money with it just sitting there.
2. FLUX.2 Technical Specifications & Upgrades
Flux 2 is an incredibly powerful 32-billion parameter model. When combined with its 24-billion parameter Mistral Small 3.1 Vision-Language Model (VLM) text encoder, the overall pipeline utilizes roughly 56 billion parameters. Before initiating training, it is crucial to understand the architectural updates:
- Guidance Distillation: Functions identically to Flux 1 Dev. It operates via a single-pass guidance embedding (typically set to ~3.0 for inference). For training, guidance must be strictly set to 1.0 (which functions as a non-operational CFG = 0).
- 32-Channel Autoencoder: Upgraded from 16 channels, minimizing pixel degradation over multiple encoding/decoding editing cycles, making it incredibly responsive to fine textures, structural details, and high-fidelity output.
- Combined Attention Layers: The official implementation combines Q, K, and V attention mechanisms into a single integrated linear layer. Consequently, a Network Rank of 32 provides significantly more capacity than an equivalent rank on decoupled architectures.
- Hardware Demands: Due to its massive footprint, loading the text encoder alone in 8-bit precision requires 24 GB of VRAM.
3. Hugging Face Authentication
Authentication is required for gated repository access to the core weights.
- Navigate to your Hugging Face account settings and accept the model terms for Flux 2.
- Create a new Access Token with Read permissions.
- Inside the AI Toolkit web UI, open the Settings tab, paste your access token, and save.
4. Dataset Preparation & Dynamic Captioning
This process is critical for isolating your target style from structural semantics.
- Gather a clean dataset of target images (e.g., 15–20 high-resolution images).
- Upload them under "Data Set" > "New Data Set".
- Caption the images by defining structural objects while deliberately omitting stylistic details. For example, use:
[trigger] a boat on the water with two men in it.
- By enclosing
[trigger]in brackets, AI Toolkit dynamically injects your target trigger phrase during runtime.
- Avoid descriptive phrases related to the aesthetic. For example, if you are targeting a clean, minimalist "museum-grade white cube" aesthetic, do not describe the professional catalog lighting or the pristine white backgrounds—leaving these uncaptioned forces the model to associate those specific visual traits directly with your chosen trigger word.
5. LoRA Parameters & Differential Output Preservation (DOP)
LoRA Parameter Configuration
- Create a New Job and specify
flux 2as the base model architecture.
- Set the data precision format to Float 8 (FP8) for both the transformer network and the text encoder, as quantization is non-negotiable even on enterprise-grade hardware.
- Configure the Network Rank to 32 and set the training guidance scale to 1.0.
Differential Output Preservation Setup
This technique prevents catastrophic forgetting and style bleed, ensuring the base model retains its inherent knowledge.
- Enable Differential Output Preservation in the configuration panel.
- Input your custom trigger word (e.g.,
samt_style).
- Define your Preservation Class as
photo.
- Mechanism: During a training step, the toolkit dynamically duplicates the batch. For the regularization pass, it strips away your LoRA layer, replaces the trigger text with
photo, and forces the model to match its native latent outputs. This prevents your style LoRA from degrading basic conceptual knowledge (like making every regular object look like it belongs in an art installation).
- Note: Because input tokens are being rewritten dynamically on a per-step basis, you cannot cache text embeddings when this option is active.
6. Validation Prompts & Evaluation Metrics
- Define regular text-to-image validation prompts to track style acquisition (e.g.,
[trigger] a woman playing chess in a park with a bomb exploding in the background).
- Define instruction-based editing prompts to test the model's multimodal flexibility (e.g.,
make this picture be [trigger] style).
- Initialize the job. Training will run at approximately 6.3 to 8.0 seconds per iteration depending on image resolutions. Execute the run for a total of 3,000 steps.
Post-Training Evaluation
Upon completing the 3,000-step run, review your validation checkpoints against the following expected behaviors:
Checkpoint Phase | Text-to-Image Behavior | Image-Editing Behavior |
Early Steps (< 500) | Native model look; text layout is correct but lacks distinct artistic textures. | Standard image conversion; subtle lighting shifts without structural deformation. |
Mid-Way (1,500) | Emergence of fine painting textures, wispy elements, and heavy brushstroke fidelity. | Begins mapping ancestral training traits; strong identity retention of base subjects. |
Terminal (3,000) | Fully isolated style application; high semantic prompt adherence despite abstract rendering. | Seamless stylistic transfer utilizing the 32-channel VAE for deep texture accuracy. |
Once the model converges and behavior aligns with the terminal phase, your .safetensors file is ready to be exported directly into node-based systems like ComfyUI for integration into production-grade generation pipelines.
Bias Correction: If you notice a demographic bias (e.g., portraits tending to shift toward a specific gender or ethnicity present in your dataset), adjust the prompt weight or inject highly explicit descriptors into your validation prompts (e.g., a man with a thick mustache) to maintain control over the base generations.
example:
🧪 مثال تطبيقي خطوة بخطوة: تدريب LoRA لشخصية «khive»
هذا المثال يطبّق الدرس أعلاه على حالة حقيقية من إنتاج الاستوديو: بناء LoRA لشخصية بشرية ثابتة (Character LoRA) بدلًا من LoRA أسلوبي (Style LoRA). الفرق جوهري — في الـ Style LoRA نعزل «الأسلوب» عن المحتوى، أما في الـ Character LoRA فنعزل «الهوية» عن الظروف (اللبس، الإضاءة، الزاوية، التعبير). المبدأ واحد، لكن اتجاه العزل معكوس.
الخطوة 0: تعريف الهدف وكلمة التشغيل
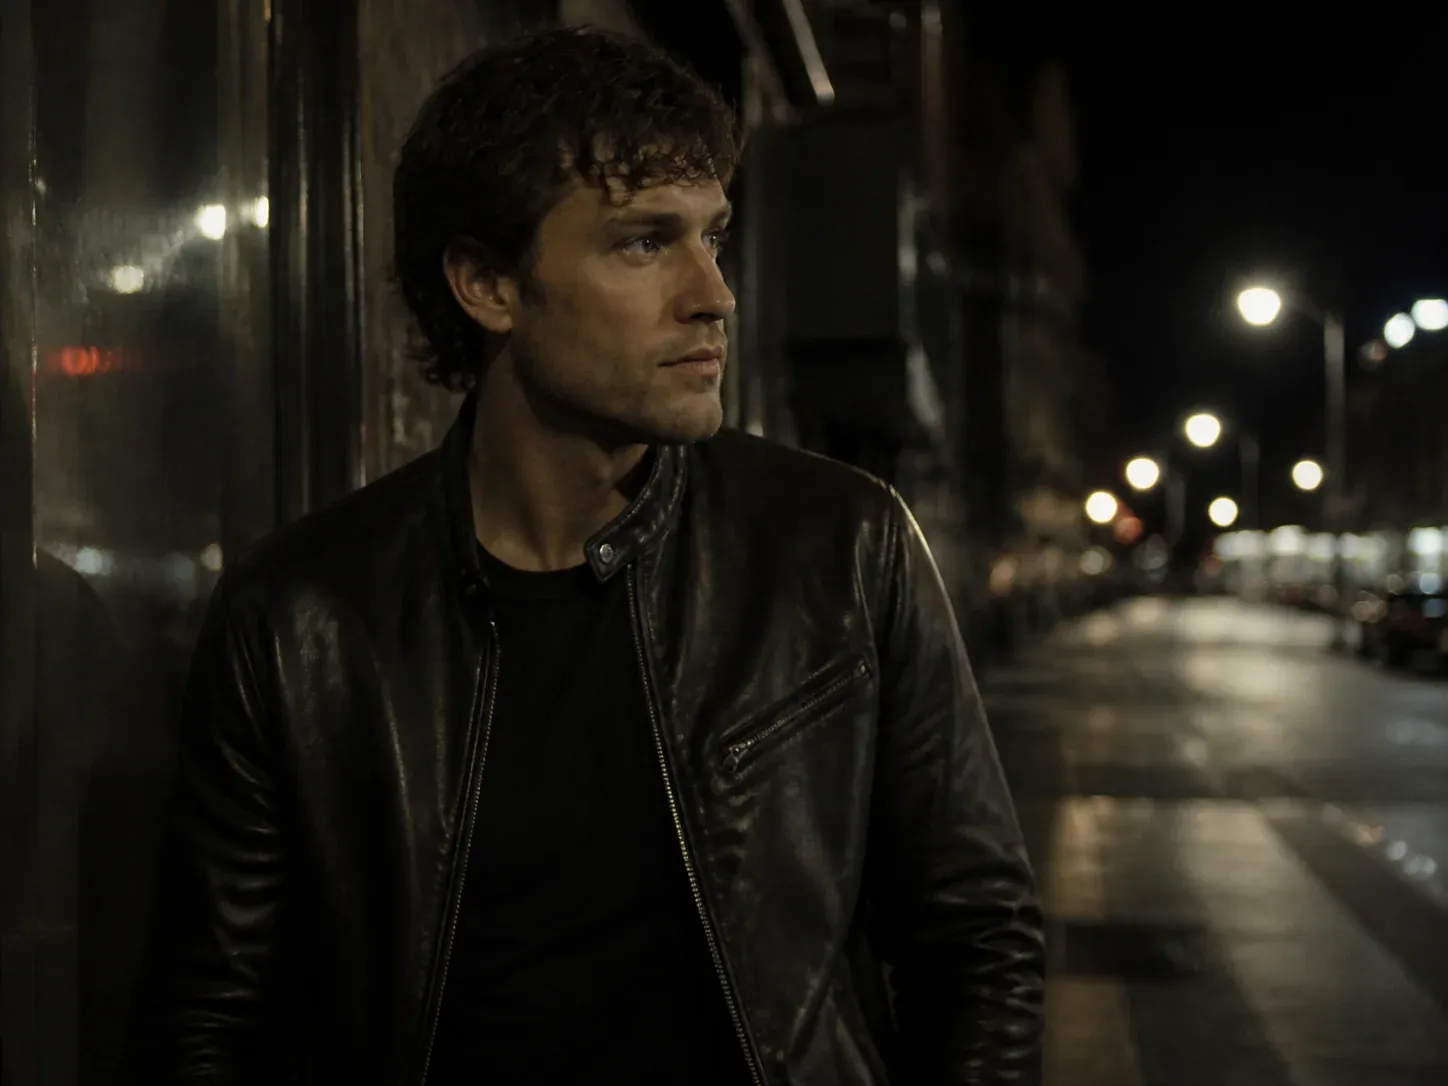
- الشخصية: khive — رجل بشعر داكن مجعّد ولحية، هوية بصرية ثابتة عبر كل اللقطات.
- كلمة التشغيل (Trigger Word):
khive— كلمة قصيرة فريدة لا تحمل معنى دلاليًا في النموذج الأساسي، حتى لا يتسرّب مفهوم سابق إلى الهوية الجديدة.
- حجم الداتاست: 55 صورة عالية الدقة. (للشخصيات، 40–60 صورة تعطي تنوعًا كافيًا في الزوايا والإضاءة دون إغراق النموذج.)
الخطوة 1: قاعدة عكس الوصف (Character vs. Style)
هذه أهم نقطة في المثال، وهي معكوسة عن القسم 4 في الدرس:
- في الـ Style LoRA نصف العناصر الهيكلية ونحذف الجماليات (نترك «الأسلوب» بلا وصف ليرتبط بكلمة التشغيل).
- في الـ Character LoRA نفعل العكس: نُبقي وصف الوجه الثابت بسيطًا جدًا (
dark curly hair, beard) ونصف بالتفصيل كل ما هو متغيّر (اللبس، الإضاءة، الزاوية، التعبير، الخلفية).
- المنطق: كل سمة نتركها دون وصف، يربطها النموذج بكلمة التشغيل
khive. نريد أن يرتبط الوجه فقط بـkhive، لا البدلة الرسمية في صورة، ولا إضاءة الـ golden hour في صورة أخرى. لذلك نصف المتغيرات صراحةً «لنحرّر» الهوية منها.
الخطوة 2: فورمات الكابشن الموحّد
كل صورة لها ملف نصّي .txt بنفس الاسم تمامًا (khive_01.jpg ← khive_01.txt)، والكابشن في سطر واحد يبدأ بكلمة التشغيل ثم فاصلة:
khive, <الزاوية>, <التعبير>, <اللبس>, <الإضاءة>, <الخلفية>أمثلة فعلية من الداتاست:
khive, three-quarter view, neutral expression, formal navy suit, soft window light, plain studio background
khive, full face, wide laugh, cool fluorescent lighting, casual t-shirt, blurred interior
khive, macro crop of eyes, contemplative, warm golden hour light, paisley scarf detail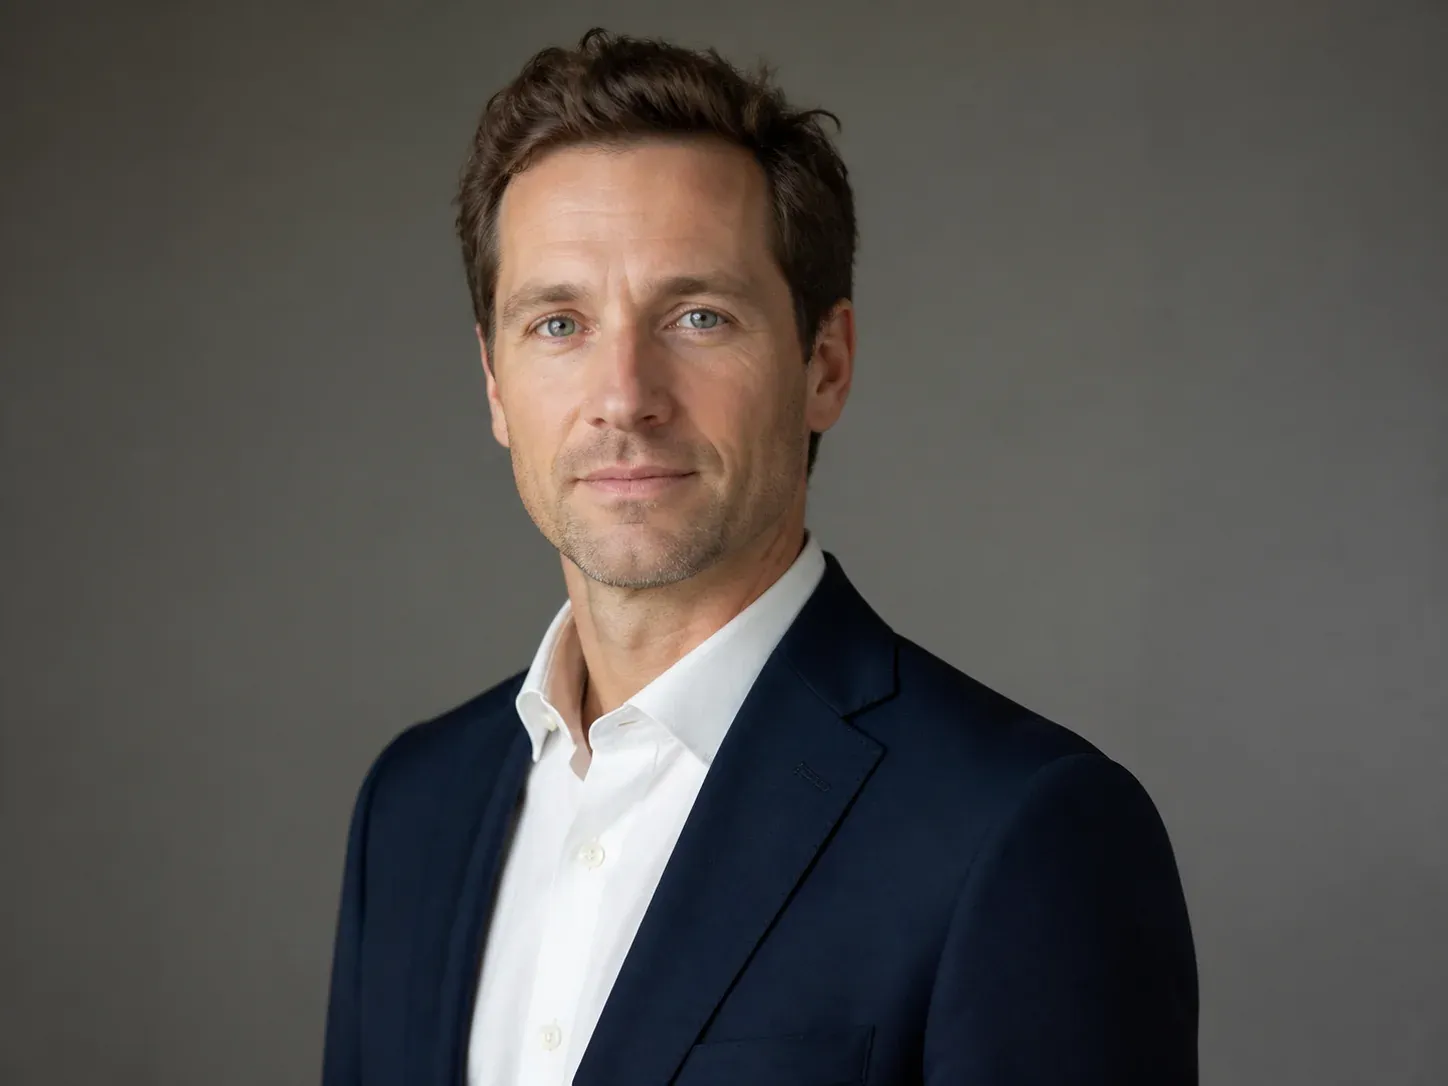
الخطوة 3: منهجية المراجعة (درس مستفاد من خطأ حقيقي)
⚠️ قاعدة حاسمة: راجع كل صورة عبر فتحها بمسارها المباشر (/mnt/user-data/uploads/khive_XX.jpg) قبل كتابة كابشنها — لا تعتمد على ترتيب الرفع. ترتيب الرفع يختلف عن أرقام الملفات، وهذا الخلط سبّب أخطاء محاذاة (كابشن لصورة يُكتب لصورة أخرى) في جلسة سابقة. المحاذاة الصحيحة بين رقم الملف والصورة شرط لنجاح التدريب.- ابنِ ملف
khive_captions_review.htmlللمراجعة البصرية: جدول من ثلاثة أعمدة (الصورة | اسم الملف | الكابشن القابل للتعديل)، مع تضمين الصور بصيغة base64 داخل الملف ليعمل من أي مكان دون اعتماد على مسارات خارجية.
- أضف زر «Copy all» وزر تنزيل ملفات الـ
.txtلتسريع التصدير إلى أداة التدريب.
الخطوة 4: ضبط نسبة اللقطات (Composition Balance)
- وازِن بين لقطات الوجه الكامل / three-quarter واللقطات الماكرو المقصوصة (عينان، أنف، فم، شعر).
- اللقطات الماكرو مفيدة لتعليم تفاصيل الهوية الدقيقة، لكن إن ارتفعت نسبتها في الداتاست كله فقد يرتبك النموذج في تكوين الوجه الكامل.
- في داتاست khive، عُدِّلت النسبة في الباتشات الأخيرة لصالح لقطات الوجه الكامل لتصحيح فائض الماكرو في الباتش الأوسط (الصور 36–41).
الخطوة 5: التعامل مع الإكسسوارات العابرة
- في الصورة 53 ظهر حلق (hoop earring). هذا عنصر متغيّر وليس جزءًا من الهوية الثابتة.
- القرار: اذكره صراحةً في الكابشن (
...hoop earring...) حتى لا يربطه النموذج بهوية khive. وإن لم يكن جزءًا من الشخصية الرسمية، فالأنظف إما حذفه من الكابشن أو استبعاد الصورة كليًا.
- القاعدة العامة: أي إكسسوار يظهر في صورة أو صورتين فقط ولا يُوصف صراحةً، يخاطر النموذج بتعلّمه كسمة ثابتة.
الخطوة 6: إعدادات التدريب (تطبيق إعدادات الدرس على شخصية)
ملاحظة شفافية: الخطوات 0–5 موثّقة من جلسة الإنتاج الفعلية (مرحلة الداتاست والوصف). الإعدادات أدناه هي إعدادات الدرس القياسية مطبّقة على Character LoRA — استخدمها كنقطة بداية وعايرها حسب نتائج التحقق.
- بنية النموذج:
flux 2.
- الدقة: FP8 لكل من المحول ومشفر النص.
- رتبة الشبكة (Network Rank): 32 (كما في الدرس؛ كافية للهوية الواحدة).
- مقياس التوجيه للتدريب: 1.0.
- DOP (الحفاظ على المخرجات التفاضلية): فعّله مع كلمة التشغيل
khiveوفئة حفظ**man**(بدلًا منphotoفي مثال الأسلوب). هذا يمنع تحوّل «كل رجل» في مخرجات النموذج إلى khive، ويحافظ على المفهوم العام للرجل سليمًا.
- عدد الخطوات: ابدأ بهدف ~2,000–2,500 خطوة للشخصية (أقل من 3,000 المطلوبة للأسلوب؛ الهوية تتقارب أسرع)، وراقب نقاط الفحص.
الخطوة 7: مطالبات التحقق الخاصة بـ khive
اختبر الهوية (هل الوجه ثابت؟) والمرونة (هل يقبل ظروفًا جديدة لم تكن في الداتاست؟):
khive, cinematic portrait, dramatic side lighting, wearing a leather jacket, city street at night
khive, smiling, bright daylight, white linen shirt, on a beach
khive, serious expression, studio headshot, charcoal grey suit, grey seamless background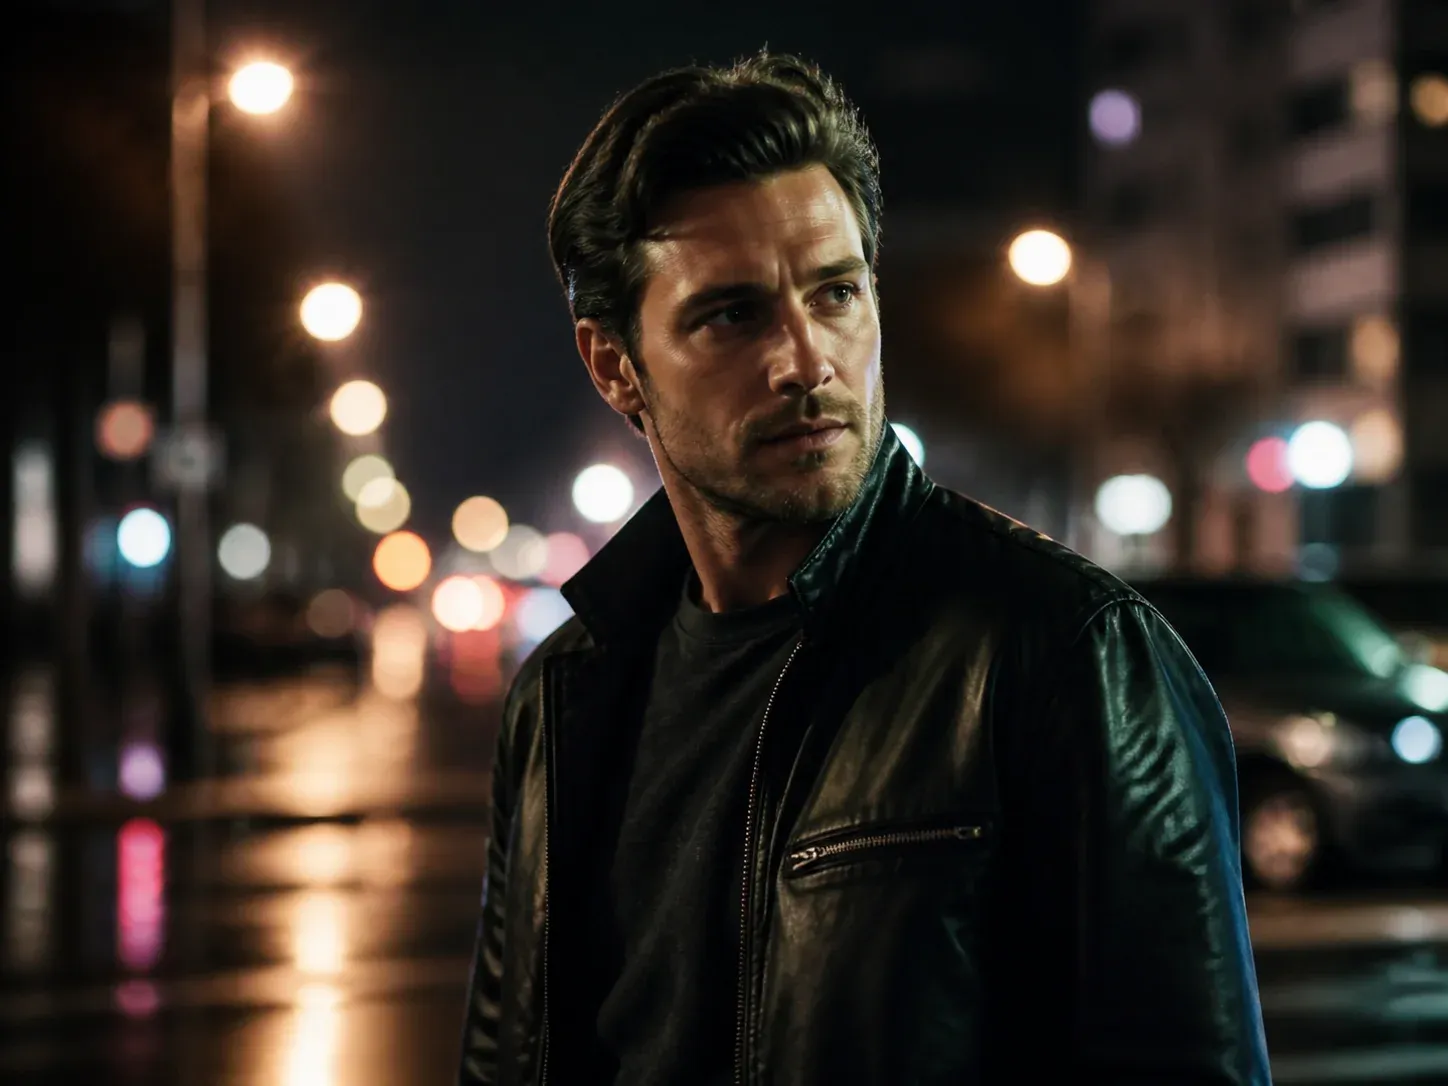
- إذا ظهر تثبيت زائد (overfitting) — مثل تكرار لبس أو خلفية بعينها من الداتاست — قلّل الخطوات أو نوّع الداتاست أكثر.
- إذا تسرّبت الهوية إلى صور بلا كلمة التشغيل، راجع فئة حفظ DOP وتأكد من وصف المتغيرات بدقة في الكابشنز.
الخطوة 8: التصدير
عند تقارب النموذج وثبات الوجه عبر مطالبات التحقق، صدّر ملف .safetensors لاستخدامه في خطوط إنتاج الاستوديو (مثل ComfyUI) لتوليد لقطات khive متّسقة عبر الحملات.
🧪 Worked Example: Training a Character LoRA for "khive"
This example applies the lesson above to a real studio production case: building a LoRA for a consistent human character (a Character LoRA) rather than a Style LoRA. The distinction matters. In a Style LoRA we isolate style from content; in a Character LoRA we isolate identity from circumstance (wardrobe, lighting, angle, expression). Same principle — opposite direction of isolation.
Step 0 — Define the goal and trigger word
- Character: khive — a man with dark curly hair and a beard, one consistent visual identity across every shot.
- Trigger word:
khive— short, unique, semantically empty in the base model, so no pre-existing concept bleeds into the new identity.
- Dataset size: 55 high-resolution images. (For characters, 40–60 images give enough variation in angle and lighting without overwhelming the model.)
Step 1 — The captioning-inversion rule (Character vs. Style)
This is the key teaching point, and it is inverted from Section 4 of the lesson:
- In a Style LoRA, you caption structural objects and omit aesthetics (leaving "style" undescribed so it binds to the trigger).
- In a Character LoRA, you do the opposite: keep the fixed-face descriptor very simple (
dark curly hair, beard) and describe every variable in detail (wardrobe, lighting, angle, expression, background).
- The logic: whatever you leave undescribed, the model binds to the trigger
khive. You want only the face bound tokhive— not the formal suit in one frame, nor the golden-hour light in another. So you describe the variables explicitly to "free" the identity from them.
Step 2 — The unified caption format
Each image gets a .txt file with an identical name (khive_01.jpg → khive_01.txt). The caption is a single line beginning with the trigger word followed by a comma:
khive, <angle>, <expression>, <wardrobe>, <lighting>, <background>Real examples from the dataset:
khive, three-quarter view, neutral expression, formal navy suit, soft window light, plain studio background
khive, full face, wide laugh, cool fluorescent lighting, casual t-shirt, blurred interior
khive, macro crop of eyes, contemplative, warm golden hour light, paisley scarf detail
Step 3 — Review methodology (a lesson learned from a real mistake)
⚠️ Critical rule: Review every image by opening it at its direct path (/mnt/user-data/uploads/khive_XX.jpg) before writing its caption — never rely on upload order. Upload order differs from file numbering, and that mismatch caused caption-misalignment errors (a caption written for the wrong image) in an earlier session. Correct file-number ↔ image alignment is a prerequisite for a successful train.- Build a
khive_captions_review.htmlfor visual QA: a three-column table (image | filename | editable caption), with images embedded as base64 inside the file so it works anywhere without external path dependencies.
- Add a "Copy all" button and a
.txtdownload button to speed export into the training tool.
Step 4 — Composition balance
- Balance full-face / three-quarter shots against tight macro crops (eyes, nose, mouth, hair).
- Macro crops are useful for teaching fine identity detail, but if their share across the whole dataset runs high, the model can struggle to compose a complete face.
- In the khive dataset, the ratio was corrected in the final batches in favor of full-face shots, to offset a macro surplus in the middle batch (images 36–41).
Step 5 — Handling transient accessories
- Image 53 showed a hoop earring. This is a variable, not part of the fixed identity.
- Decision: name it explicitly in the caption (
...hoop earring...) so the model does not bind it to khive's identity. If it isn't part of the official character, the cleaner move is to drop it from the caption or exclude the image entirely.
- General rule: any accessory that appears in only one or two images and is not explicitly captioned risks being learned as a permanent trait.
Step 6 — Training settings (lesson defaults applied to a character)
Transparency note: Steps 0–5 are documented from the actual production session (the dataset & captioning stage). The settings below are the lesson's standard settings adapted for a Character LoRA — use them as a starting point and calibrate against your validation results.
- Base architecture:
flux 2.
- Precision: FP8 for both the transformer and the text encoder.
- Network Rank: 32 (as in the lesson; sufficient for a single identity).
- Training guidance scale: 1.0.
- DOP (Differential Output Preservation): enable it with trigger
khiveand a preservation class of**man**(instead ofphotofrom the style example). This stops "every man" in the model's output from drifting toward khive, keeping the general concept of a man intact.
- Step count: start with a target of ~2,000–2,500 steps for a character (fewer than the 3,000 a style needs; identity converges faster), and watch the checkpoints.
Step 7 — khive validation prompts
Test both identity (is the face stable?) and flexibility (does it accept new circumstances absent from the dataset?):
khive, cinematic portrait, dramatic side lighting, wearing a leather jacket, city street at night
khive, smiling, bright daylight, white linen shirt, on a beach
khive, serious expression, studio headshot, charcoal grey suit, grey seamless background- If you see overfitting — e.g. a specific wardrobe or background from the dataset repeating — reduce steps or diversify the dataset further.
- If identity bleeds into images without the trigger word, revisit the DOP preservation class and confirm the variables are precisely described in your captions.
Step 8 — Export
Once the model converges and the face holds steady across validation prompts, export the .safetensors file for use in the studio's production pipelines (e.g. ComfyUI) to generate consistent khive shots across campaigns.